Install on Windows
VisData™ runs as a web application within Docker which can be run in Windows machine through WSL. The VisData Launcher is used to update the app, configure workspaces, and managed licenses and needs to be installed as the first step.
On Windows the launcher can be run either through the WSLg graphical interface
or using the command-line interface with VisData Launcher --headless flag.
- Requirements
At least Windows 10, 22H2 (10.0.19045) for graphical support
At least Windows 10, 10.0.19041 for terminal-only support
Windows Subsystem for Linux 2 (WSL 2)
An Ubuntu 18.04, 20.04 or 22.04 WSL target
Docker 20.10.23+ (running in the WSL target)
64-bit x86 processor (Intel and AMD) with virtualization instructions enabled
At least 8GB of total memory
2.5 GB of disk space for minimal install
Note
VisData™ Beta is officially supported on Linux and Windows (WSL). For Linux see Install on Linux.
Virtualization Check
Running WSL on Windows requires virtualization instructions to be enabled in the BIOS. If you are unsure if your system is setup for virtualization please see the following guide to verify and enable virtualization. You can skip this step if you know you can run any of the following software: Docker, VirtualBox, VMWare products, or Vagrant .
Install WSL
Ubuntu 22.04 is recommended to run VisData in WSL and it is currently the default “Ubuntu” distribution on WSL. The following official WSL install guide from Microsoft is used as reference.
Open PowerShell or Windows Command Prompt in administrator mode by right-clicking and selecting “Run as administrator”.
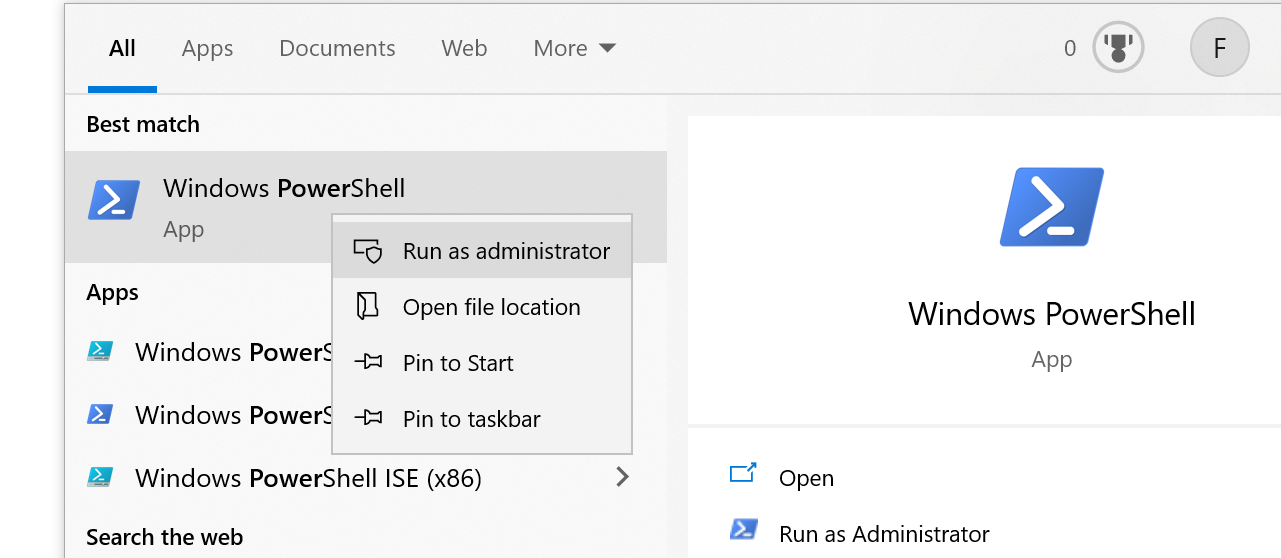
The following installer will guide you through the setup:
wsl --install -d Ubuntu
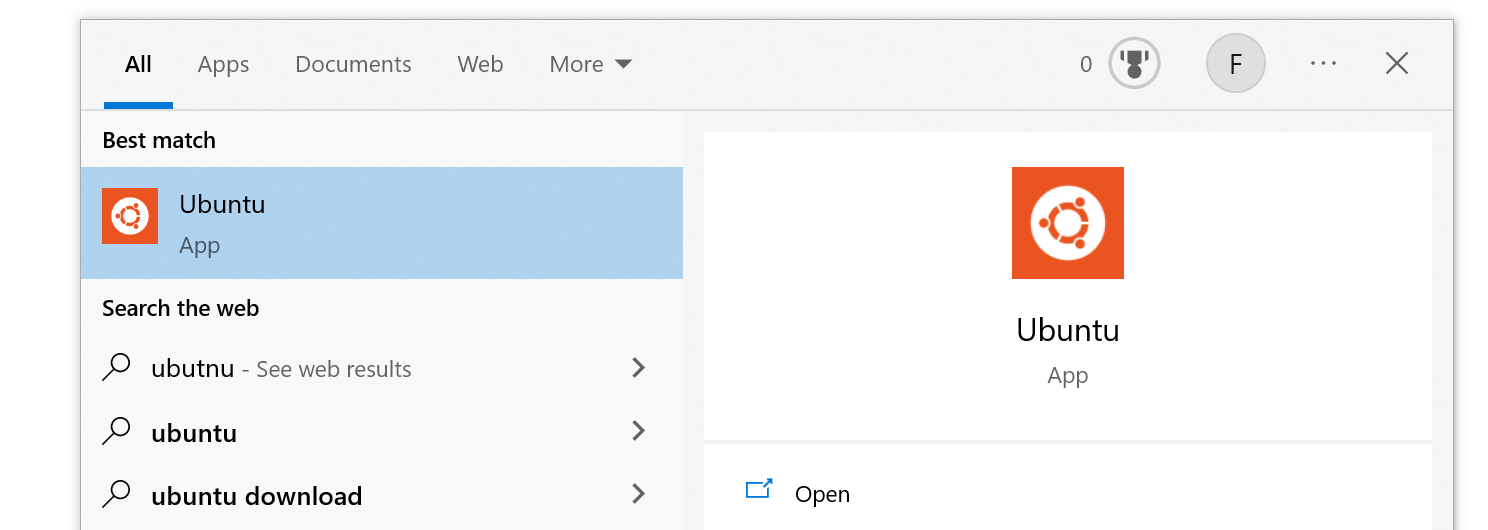
After successful installation this will create an “Ubuntu” entry in the start menu.
Install Dependencies
Install the latest Docker from Docker’s official repository.
Using Ubuntu’s default docker.io package is not recommended under WSL.
Instead please use the following steps from the official Docker install guide.
First uninstall any default system Docker installations.
sudo apt-get remove docker.io containerd runc
Ensure you have curl to run the VisData installation script
sudo apt install curl
Install Docker from their official apt repository:
sudo apt-get install ca-certificates curl gnupg lsb-release
sudo mkdir -p /etc/apt/keyrings
curl -fsSL https://download.docker.com/linux/ubuntu/gpg | sudo gpg --dearmor -o /etc/apt/keyrings/docker.gpg
echo \
  "deb [arch=$(dpkg --print-architecture) signed-by=/etc/apt/keyrings/docker.gpg] https://download.docker.com/linux/ubuntu \
  $(lsb_release -cs) stable" | sudo tee /etc/apt/sources.list.d/docker.list > /dev/null
sudo apt-get update
sudo apt-get install docker-ce docker-ce-cli containerd.io docker-compose-plugin
By default Docker is configured to communicate only with the root user
and to allow your user to run Docker containers add yourself to the docker group.
sudo groupadd docker
sudo usermod -aG docker $USER

# Restarting the WSL session is highly recommended to ensure group access is applied everywhere

# Alternatively run the following to apply the new group in the current terminal session
newgrp docker
To verify that your user is part of the docker group run the following:
id | grep docker
# Expected output:
#   .. gid=136(docker) groups=136(docker), ..
In WSL the Docker service does not start automatically so run:
sudo service docker start
Verify that Docker is working:
sudo docker run hello-world
GUI Install
Install the VisData Launcher
curl -s https://visdata.io/beta/get-visdata.sh | bash

# Run the launcher
visdata
Note
The graphical layer for WSL (WSLg) is relatively new and requires Windows 10.0.19045+ or Windows 11.
If you are unable to get a $DISPLAY please update Windows and run the follow after the update:
wsl --update
wsl --shutdown
Alternatively, the Headless Install guide has more relaxed requirements.
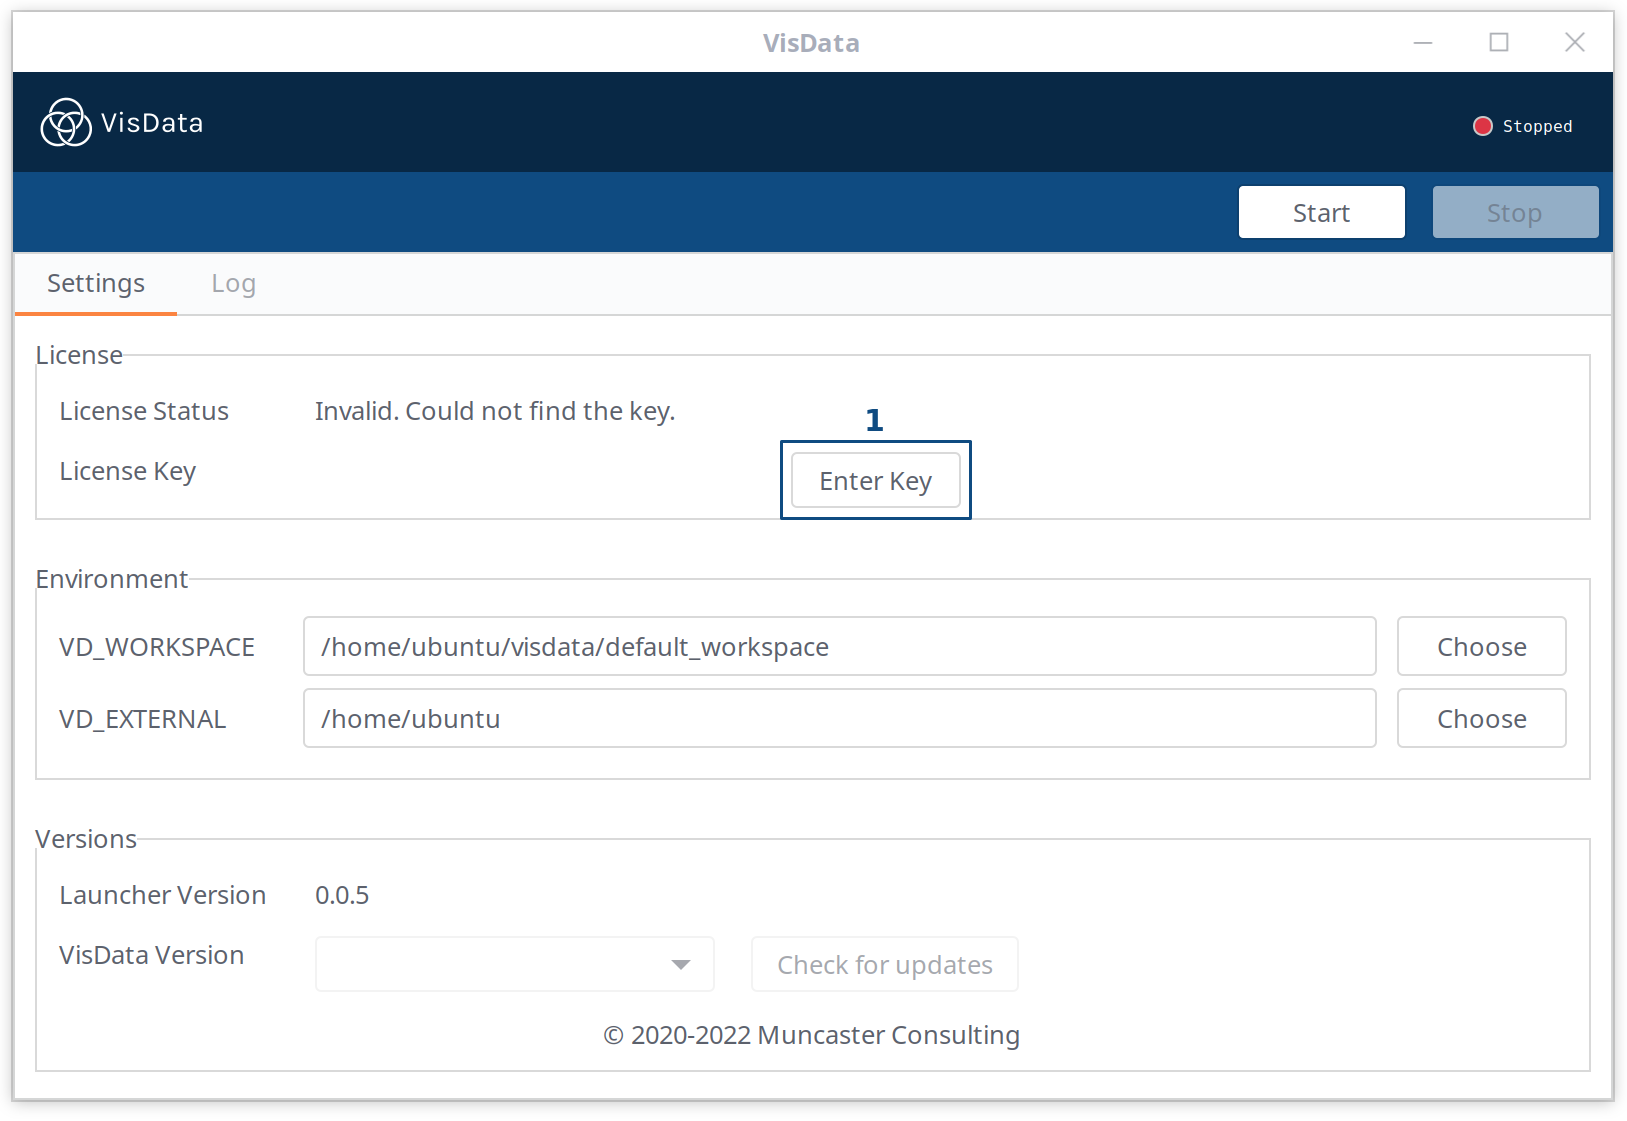
After starting the VisData Launcher you will need to enter a license key (1).
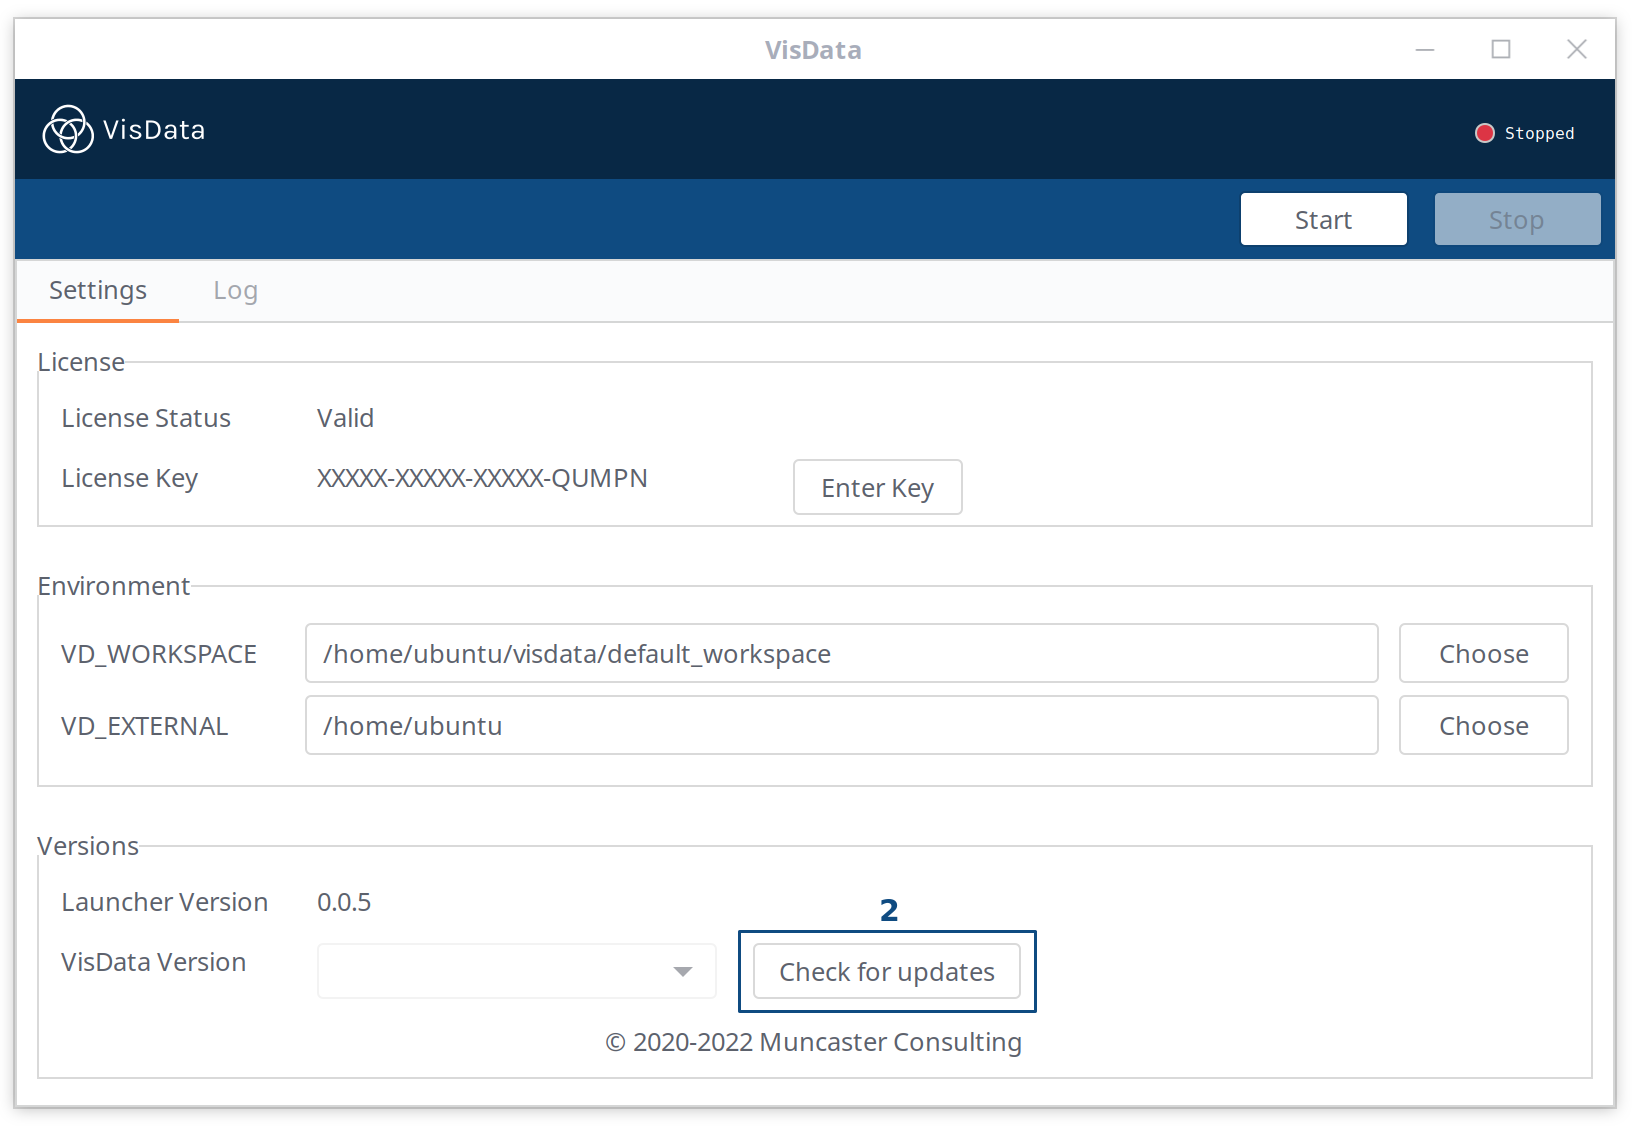
Once the license key has been verified press “Check for updates” (2) which will allow you to download the latest app.
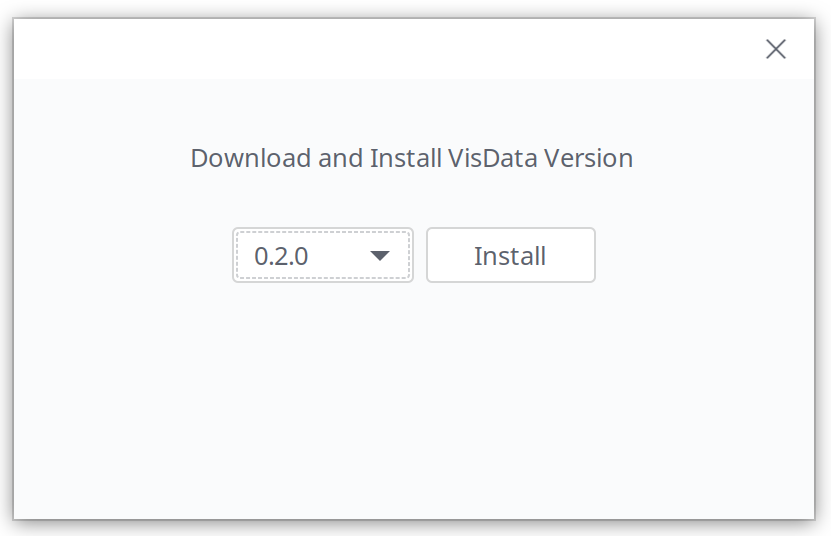
Select the latest version (newest versions are shown at the top) and press install. This will download and install a VisData image.
After downloading a VisData image press “Start” (3). After a moment a login link with appear (4). Press it to open VisData in the browser.
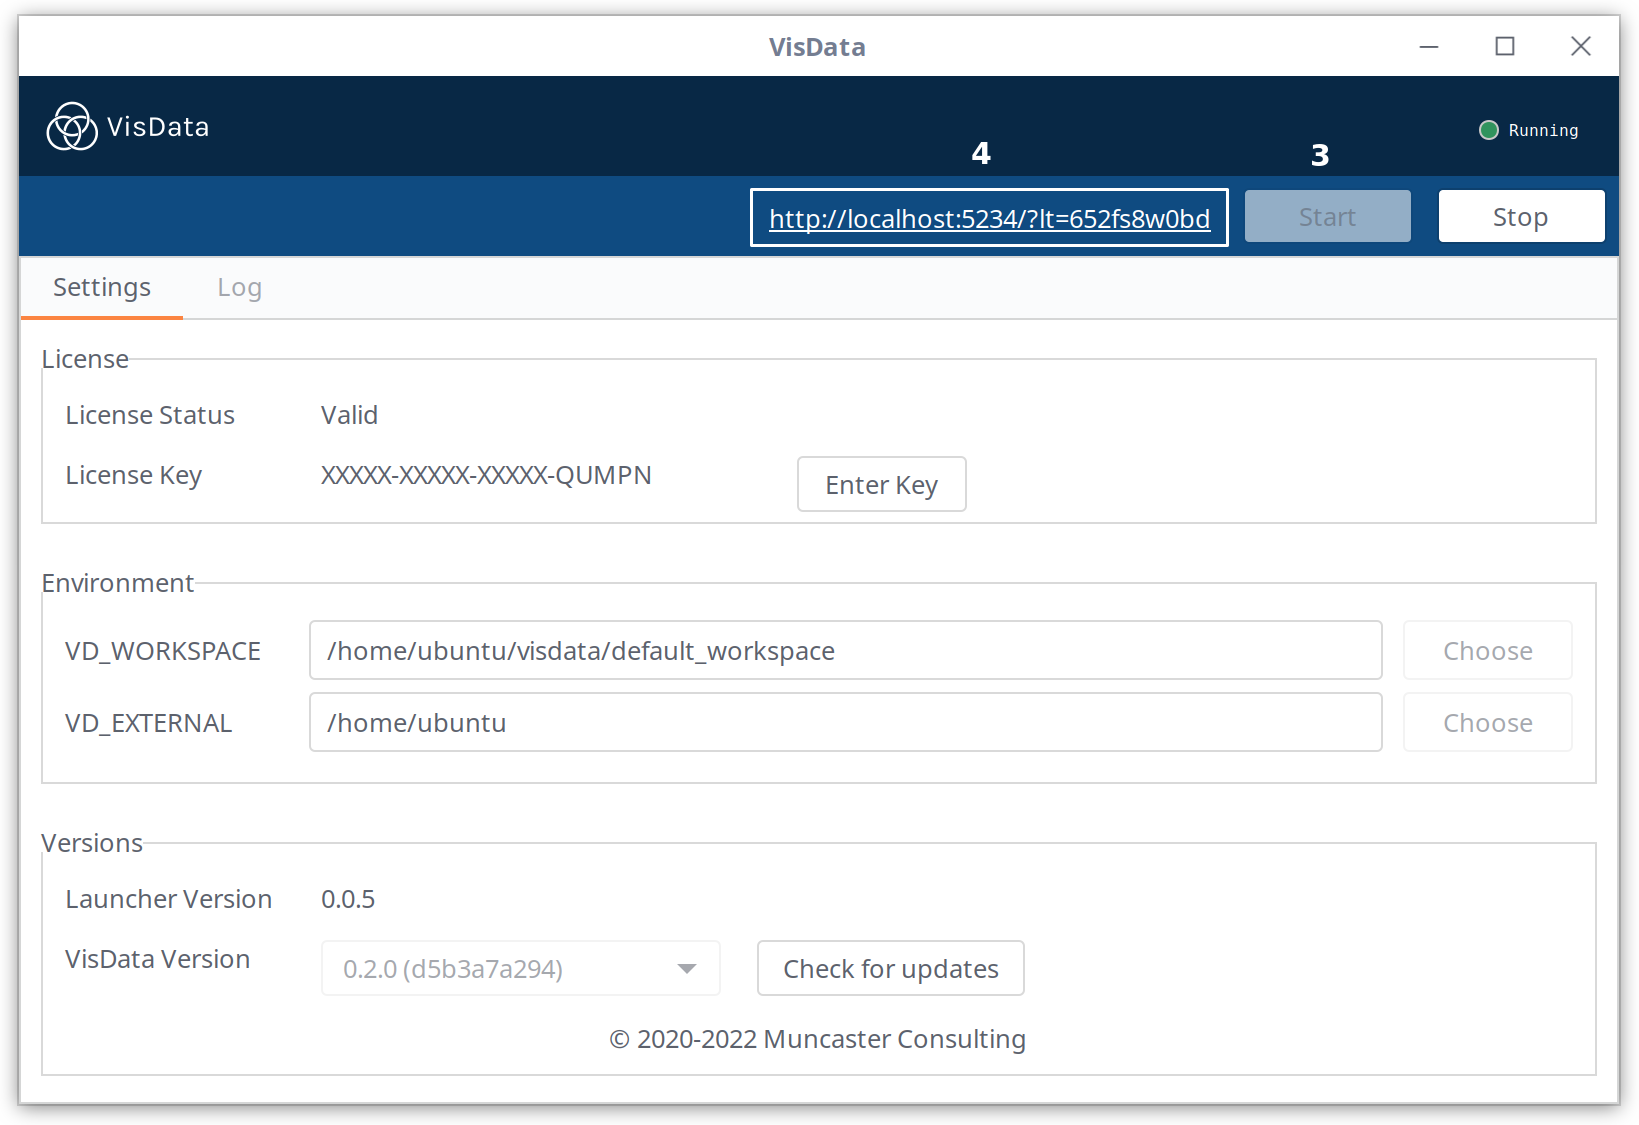
After successful installation proceed to the Quick Start Guide
Headless Install
The VisData Launcher comes with a command-line interface (CLI) for running on a headless machine in a server environment.
Initial installation is the same as with the GUI-based approach:
curl -s https://visdata.io/beta/get-visdata.sh | bash
During installation the VisData executable is installed to ~/.local/bin/ allowing the user to open
the VisData Launcher from anywhere.
Display launcher version and usage:
visdata -v
VisData Launcher v0.0.9

usage: visdata_launcher [-h] [-v] [--no_auth] [--debug]
                        [--headless [{enter_license,install,start,list,help}]]
                        [--version VERSION]
Enter product license key
visdata --headless enter_license
VisData Launcher v0.0.9
Current VisData license key:
Please enter your license key:
xxxx-xxxx-xxxx-xxxx
Successfully updated license key...
Download the latest version of the app
visdata --headless install
VisData Launcher v0.0.9
Installing the latest available version of VisData with the tag: "0.2.5"
 -------------------------------------------------
                    Usage Hints
 -------------------------------------------------
 To list all available versions run the following:
   ./visdata_launcher --headless list

 To install a specific version run
   ./visdata_launcher --headless install --version 0.2.5
..
Downloading...
Extracting
Pull complete
Finished downloading new image
Configure workspace
vim ~/.visdata/config/visdata.config
"workspaces": [
    {
        "name": "default",
        "workspace": "/home/username/visdata/default_workspace",
        "external_data": "/mnt/external_disk"
    }
]
Launch the app
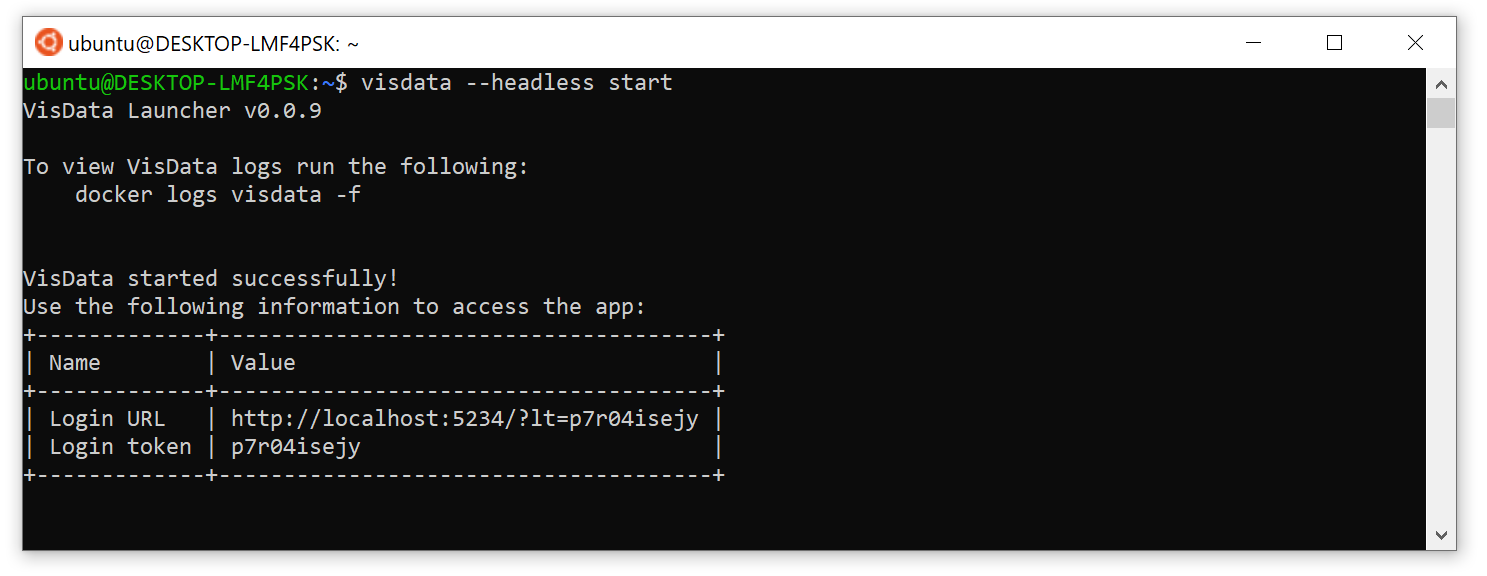
visdata --headless start
Troubleshooting
Docker Permissions Error
Symptom
A Docker permissions error can manifest itself as the following error message.

In addition, you may see the following when running the VisData Launcher from the command line you may see the following error
ERROR: Docker initialization failed...
Error while fetching server API version: ('Connection aborted.', PermissionError(13, 'Permission denied'))
You may also see the following when running Docker commands directly
docker: Got permission denied while trying to connect to the Docker daemon socket at unix:///var/run/docker.sock
Solution 1
The docker daemon is not running and can be started with:
sudo service docker start
Check the status of the daemon with:
sudo service docker status
* Docker is running
Solution 2
Add your current user to the docker group and then it is recommended to restart WSL by first running wsl --shutdown
and then opening “Ubuntu” from the start menu.
The following shows an alternative way apply group changes, but it will only apply to the current terminal session.
# Add a docker group
sudo groupadd docker

# Add docker group to user
sudo usermod -aG docker $USER

# Apply new group changes in the current terminal
newgrp docker
Now check your Docker installation is to try this simple test. You should be able to be run the command without root privileges.
docker run -it hello-world
This is the expected output:
    Unable to find image 'hello-world:latest' locally
    latest: Pulling from library/hello-world
    2db29710123e: Pull complete
    Digest: sha256:97a379f4f88575512824f3b352bc03cd75e239179eea0fecc38e597b2209f49a
    Status: Downloaded newer image for hello-world:latest

    Hello from Docker!
    This message shows that your installation appears to be working correctly.

    To generate this message, Docker took the following steps:
     1. The Docker client contacted the Docker daemon.
     2. The Docker daemon pulled the "hello-world" image from the Docker Hub.
        (amd64)
     3. The Docker daemon created a new container from that image which runs the
        executable that produces the output you are currently reading.
     4. The Docker daemon streamed that output to the Docker client, which sent it
        to your terminal.
Missing GLIBC
Symptom
[2711] Error loading Python lib '/home/ubuntu/.visdata/bin/visdata_launcher/libpython3.6m.so.1.0':
       dlopen: /lib/x86_64-linux-gnu/libc.so.6: version `GLIBC_2.25' not found
       (required by /home/ubuntu/.visdata/bin/visdata_launcher/libpython3.6m.so.1.0)
Solution
VisData requires a modern Linux distribution such as Ubuntu 18.04 or Ubuntu 20.04.
Ubuntu 16.04 LTS has reached end-of-life, so for security and stability it is no longer supported.
Launcher Unexpectedly Crashes
Symptom
VisData Launcher unexpectedly crashes while using the app.
Solution
The VisData Launcher requires a connection to the internet and the Docker engine must be running, so first please make sure those requirements are satisfied.
Run docker info to get additional Docker details
docker info
Client:
 Context:    default
 Debug Mode: false
 Plugins:
  app: Docker App (Docker Inc., v0.9.1-beta3)
  buildx: Docker Buildx (Docker Inc., v0.10.0-docker)
  compose: Docker Compose (Docker Inc., v2.15.1)
  scan: Docker Scan (Docker Inc., v0.23.0)

Server:
 Containers: 1
  Running: 0
  Paused: 0
  Stopped: 1
 Images: 2
 Server Version: 20.10.23
 Storage Driver: overlay2
  Backing Filesystem: extfs
  Supports d_type: true
  Native Overlay Diff: true
  userxattr: false
 Logging Driver: json-file
 Cgroup Driver: cgroupfs
 Cgroup Version: 1
...
You can try running the launcher directly by executing:
$ visdata

# Alternative in case the
$ bash ~/.visdata/bin/visdata

# Or alternatively run the binary directly
$ ~/.visdata/bin/visdata_launcher/visdata_launcher
This may expose errors that are not shown in the user interface. If these steps do not lead to a simple solution please reach out to VisData support for additional help.
VisData Does Not Launch When I Press “Start”
Symptom
When pressing start from the launcher nothing happens.
Solution
Please view the log tab in the launcher as this may expose common problems. If this step does not lead to a simple solution please reach out to VisData support for additional help.
Slow Start-Up Time with Non-functional Search
Symptom
The app starts up, but only after a long wait time, but does not function properly with the following errors in the log tab (or alternately printed in headless mode in Docker logs):
Starting Docker Container
Running as user ID: 1000046
[0.001s][warning][os,container] Duplicate cpuset controllers detected. Picking /sys/fs/cgroup/cpuset, skipping /usr/src/app/vd_external/sys/fs/cgroup/cpuset.
[0.002s][warning][os,container] Duplicate cpuset controllers detected. Picking /sys/fs/cgroup/cpuset, skipping /usr/src/app/vd_external/var/lib/docker/overlay2/03d4aff14d45dd7ccee180425a7a8740bf0b925e90d2a6d915b32cc342fad81b/merged/sys/fs/cgroup/cpuset.
Error: Could not find or load main class [0.001s][warning][os,container]
Caused by: java.lang.ClassNotFoundException: [0/001s][warning][os,container]
Solution
This is a result of setting the External Data path to the system root: /. Set your External Data path to a more specific path that does not encompass the /sys directory.
When the /sys directory is mounted multiple times Elasticsearch refuses to work properly.
Miscellaneous
Removing old VisData images
You can remove old VisData Docker images with the following (this will not delete any of your workspace data):
# First list all available images
docker images

REPOSITORY                                            TAG     IMAGE ID      CREATED      SIZE
781755162954.dkr.ecr.us-west-1.amazonaws.com/visdata  0.1.2   3d215b1968be  12 days ago  2.28GB
781755162954.dkr.ecr.us-west-1.amazonaws.com/visdata  0.0.7   dd485bbbaf33  3 months ago 2.93GB <- Old version
...

# Delete an old image by image id
docker rmi dd485bbbaf33